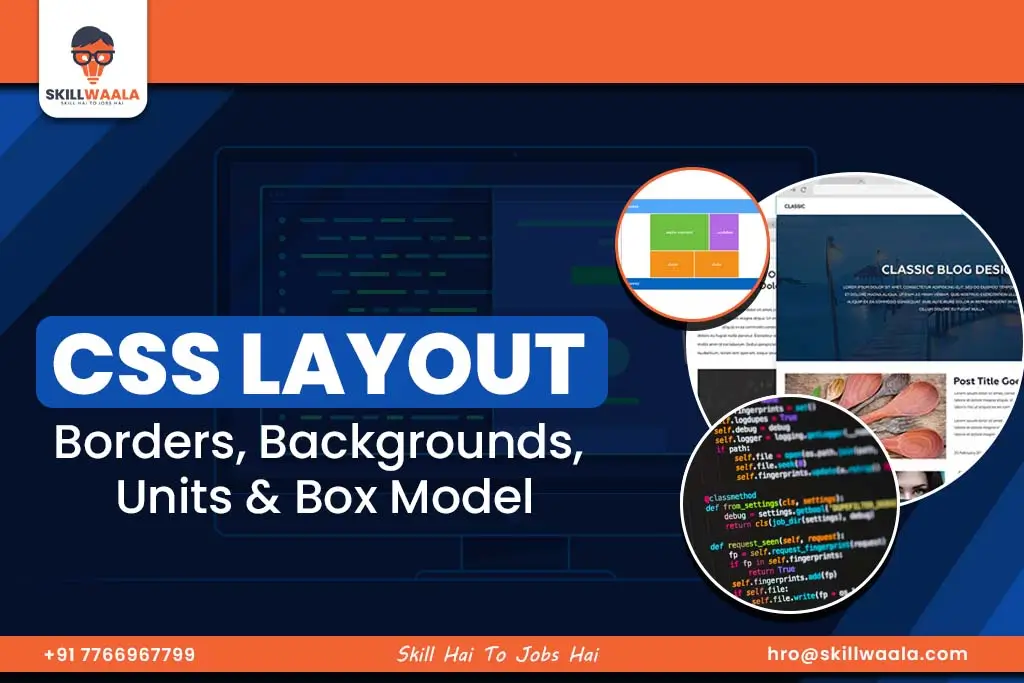
If you want to learn CSS and want to build responsive and professional-looking websites, then it is important that you understand borders, backgrounds, spacing, CSS units, and the box model. These are the concepts that help developers create clean layouts and manage element spacing properly so that the website appears good on every screen size.
This article will help you learn:
- CSS border styles and rounded corners
- Background colors and images
- Absolute vs relative CSS units
- Margin vs padding differences
- CSS height and width properties
- The CSS box model with examples
Read this article till the end so you can better understand how to structure layouts properly and create good-looking web pages by using CSS.
CSS Border Properties Explained with Examples
What is border-style in CSS?
Border-style property is used in CSS to set a design for the border of an element. Moreover, it is up to you whether you want your border to be solid, dotted, dashed, double, or any other style, like this:
border-style: solid;
With this, a simple solid border is inserted at all 4 sides of the element.
Border Properties
- Border-style– Defines the border type.
border-style: solid; /* Other values: dashed, dotted, double, groove, ridge, inset, outset, none */ - border-width– Sets the thickness of the border.
border-width: 5px; - border-color– Changes the border color.
border-color: red; - Shorthand Border Property
border: 3px solid blue; /* width, style, color */ - Rounded Borders
border-radius– Creates rounded corners.
border-radius: 10px;
- Fully rounded shape (circle/oval)
border-radius: 50%;
Also Read: Ultimate Guide to CSS: Importance, Types, and How to Learn CSS
How to use border-width effectively?
In CSS, the border-width property is used to control the thickness of the border of an element. Fixed units like px, em, and rem can be used in this process. Moreover, if you want the borders of all the sides to be the same, you can simply write:
border-width: 2px;
However, if you plan to set the width of each side differently, you can write this:
border-width: 2px 4px 6px 8px;
This means
- Top border: 2px
- Right border: 4px
- Bottom border: 6px
- Left border: 8px
Without border style, you won’t be able to see the border width, so it is important to set border style too.
Also Read: Learn Full-Stack-Web Development: No Experience Needed!
Changing the border colour in CSS
Border-color property is used in CSS to change the border color of an element. You can specify colors using basic color names like ‘red’ or ‘blue’, HEX codes such as ‘#ff0000’, or RGB values like ‘rgb(255, 0, 0)’.
Example:
border: 2px solid;
border-color: green;
If you want, you can keep different colors for each side:
border-color: red blue green yellow;
This means: top border red, right blue, bottom green, left yellow.
CSS Border Shorthand Property
The CSS border shorthand property helps define all the border parts in one line, like border-width, border-style, and border-color.
Example: border: 2px solid black;
This states that the border will be 2px wide with a solid style and black color. You must have noticed that you don’t have to write 3 different properties, saving a lot of time and space.
Also Read: Is Full Stack Developer a Good Career?
How to Make Rounded Corners with border-radius?
We use border radius to make the edges of an image, box, or button smoother and more stylish, giving the design a more modern and clean look. Here is the basic syntax:
selector {
border-radius: value;
}
You can use both px and % :
px = Roundness based on pixels
% = Roundness based on percentage
Opacity (Transparency in CSS)
The opacity property controls the transparency of an element. Opacity: 0 means completely invisible, and Opacity: 1 means fully visible. With it, you can show a text, image, or a box with little visibility to make it appear more stylish.
Example:
selector {
opacity: value;
}
div {
opacity: 0.5;
}
You must be able to understand, with this example, that the div element will be 50% visible, neither will it appear completely, nor will it be hidden.
Also Read: How to Become a React JS Developer?
CSS Backgrounds
CSS background is used to add color, image, or patterns to the background of any element. Moreover, you can also customize your designs with background color, image, position, repeat, size, and attachment options. These properties help make your website visually appealing and professional. Now, let’s move ahead and break down the background properties:
Background Properties
Here is the list of CSS background properties that you should be aware of:
background-color– Sets the background color.
background-color: lightgray;
background-image – Adds an image as a background.
background-image: url(‘image.jpg’);
background-repeat – Controls image repetition.
background-repeat: no-repeat; /* Other values: repeat, repeat-x, repeat-y */
background-position – Positions the background image.
background-position: center top; /* (x-axis y-axis) */
background-attachment – Defines if the background scrolls with the content.
background-attachment: fixed; /* Other values: scroll, local */
background-size – Specifies the size of the background image.
background-size: cover; /* Other values: contain, auto, specific size (px, %, em) */
- Cover – Scales the image to fill the container while maintaining aspect ratio.
- Contain – Resizes the image to fit within the container without cropping.
- Auto – Uses the image’s original size.
- Custom values (100px 200px or 50% 50%) allow exact control.
Shorthand Background Property
With the shorthand background property, you can set background color, image, position, repeat, size, and attachment, all in one line. You can consider it a shortcut to write CSS, which makes the code short and clean.
Example:
div {
background: url(“bg.jpg”) no-repeat center/cover fixed #f0f0f0;
}
Here is a breakdown of this example:
url(“bg.jpg”) – background image
no-repeat – image repeat nahi hoga
center/cover – center position + cover size
fixed – background scroll nahi karega
#f0f0f0 – background color
Difference Between Absolute and Relative CSS Units
CSS units help define the size, margin, and position of an element. Mainly, there are two types of units: one is absolute, and the other is relative. Now, let’s deep dive into understanding CSS units in a more precise way, along with their two types, absolute and relative.
Absolute Units: (Fixed sizes)
- px (Pixels) –They are commonly used and do not scale with screen size.
Relative Units: (Scales with viewport or parent element)
- % – Relative to the parent element.
- em – Relative to the size of the parent font.
- rem – It’s relative to the font size of the root () element.
- vw (Viewport Width) – Relative to the viewport width.
- vh (Viewport Height) – Relative to the viewport height.
CSS Height and Width
- Width and height specify an element’s size.
- Values can be in px, %, em, rem, vw, vh, etc.
- Default behavior: Block elements take full width, inline elements take only the required width.
Min and Max Dimensions
Min-Width & Min-Height:
- Ensures an element does not get smaller than a specified value.
Max-Width & Max-Height
- Prevents the element from exceeding a maximum size.
Margin vs Padding in CSS
a) Margin (Space Outside an Element)
- margin: 20px; (applies to all sides)
- margin: 10px 20px; (top-bottom | left-right)
- margin: 10px 15px 20px; (top | left-right | bottom)
- margin: 5px 10px 15px 20px; (top | right | bottom | left)
- margin: auto; (centers the element horizontally)
b) Padding (Space Inside an Element)
Works the same as margin but adds space inside the element. Padding defines the space between the content and its border. You can apply padding everywhere by writing shorthand like padding: 10px. Or you can also give separate values to specific sides like top, right, bottom, and left. This will ensure that the element content appears a bit farther from the content border, making it cleaner to look at.
What is the Difference Between Margin and Padding in CSS?
When beginners learn CSS layouts they often get confused between margin and padding because both are related to spacing. But they work differently and are used for separate purposes in web design.
In simple terms, margin adds space outside an element, which helps separate sections, boxes, or images. Conversely, padding introduces space inside an element, providing space between the content and its border. Recognising this difference is extremely important because appropriate spacing enhances website cleanliness, organisation, and visual appeal. appealing.
Here is a quick comparison to understand margin and padding more clearly:
| Feature | Margin | Padding |
|---|---|---|
| Space Type | Outside element | Inside element |
| Affects Background | No | Yes |
| Purpose | Creates distance between elements | Adds breathing space to content |
| Can be Auto | Yes | No |
Let’s take an example for better understanding. For example, if two sections on a webpage are appearing too close to each other, you can use margin to create space between them. But if text inside a button or card looks cramped, padding helps by adding internal spacing and improving readability.
In short, margin manages outer spacing, while padding improves inner spacing. Using both correctly helps developers create balanced, professional, and user-friendly layouts.
How the CSS Box Model Works
To explain it in one line, the CSS box model defines how an element’s size is calculated. To elaborate, it can be said that it is a concept in which every element is treated like a box that has content, padding, border, and margin. By using this model, you can easily control the size and positioning of an element.
Box Model Structure
- Content – The text or image inside the element.
- Padding – Space between content and border.
- Border – Outline surrounding padding.
- Margin – Space outside the border.
Final Size Calculation
- Width = Content width + Left Padding +Right Padding + Left Border + Right Border
- Height = Content height + Top Padding +Bottom Padding + Top Border + Bottom Border
Box-Sizing: Border-Box
box-sizing: border-box means that when you set the width or height of an element, then padding and border get included in it (width/height) as well. It helps in predicting the actual size of an element and eases the process of managing layouts.
div {
width: 200px;
height: 100px;
padding: 20px;
border: 5px solid black;
box-sizing: border-box;
background-colour: lightblue;
}
It means:
width: 200px and height: 100px will include the padding and border within the element’s total size.
If box-sizing: content-box; was used, the width and height would increase by the padding and border size.
Also Read: Ultimate Guide to Courses for Website Development for Every Skill Level
Common CSS Layout Mistakes Beginners Should Avoid
Beginners often make small layout mistakes when learning CSS that can affect the appearance and responsiveness of a website. It becomes important to understand these common errors early so that you can write cleaner CSS and create better-looking web pages.
1. Using Too Many Fixed `px` Values
There are many beginners who rely only on `px` units for widths, fonts, and spacing. While pixels provide precise sizing, excessive use can make layouts less responsive on different screen sizes. Instead flexible units like `rem`, `%`, or `vw` should be used for better adaptability.
2. Confusing Margin and Padding
Using margin when padding is required or vice versa is a common mistake. Remember, margin creates space outside an element, while padding creates space inside the border. If you mix them, the layouts can appear unbalanced or messy.
3. Forgetting `box-sizing: border-box`
Without `box-sizing: border-box`, padding and borders increase the total width and height of an element, which may break layouts unexpectedly. Adding this property makes element sizing easier to control and more predictable.
4. Overusing Absolute Positioning
Using `position: absolute` too often can make layouts difficult to manage, especially on smaller screens. Elements may overlap or shift unexpectedly. It is better to use modern layout systems like Flexbox or CSS Grid whenever possible.
5. Ignoring Responsive Units (`rem`, `%`, `vw`)
Beginners sometimes forget that websites should work well on all devices. Relying only on fixed sizes may create poor mobile experiences. Responsive units like `rem`, `%`, and `vw` help layouts adjust smoothly across different screen sizes.
Best Practices for Responsive CSS Layouts
Creating a responsive website means that make sure your layout looks clean and works properly on desktops, tablets, and mobile devices. By following a few simple CSS practices, you can build flexible and user-friendly layouts that adapt smoothly to different screen sizes.
1. Prefer `rem` Over `px` for Text
Using `rem` for font sizes makes text more scalable and accessible across devices. Unlike `px`, `rem` adjusts based on the root font size, helping maintain consistent readability on different screen resolutions.
2. Use `%` for Flexible Widths
Instead of giving elements a fixed width like `500px`, consider using percentage values (`%`). Flexible widths allow elements to resize according to the parent container, making layouts more adaptable to different screen sizes.
3. Use `max-width` Instead of Fixed Width
Fixed widths can make content overflow on smaller devices. Using `max-width` helps elements shrink when needed while still maintaining a proper size on larger screens. This improves responsiveness and prevents layout breaking.
4. Use `box-sizing: border-box`
Adding `box-sizing: border-box` makes CSS layouts easier to manage because padding and borders are included within an element’s defined width and height. This creates more predictable sizing and helps avoid spacing issues.
5. Avoid Fixed Heights
Creating a set height for elements may cause the content to overflow or appear cramped when viewing on smaller screens. Elements should be free to grow according to the content inside them which will help keep your designs looking crisp and clean while being more adaptable.
6. Use Flexbox or CSS Grid for Layouts
Modern CSS layout systems like Flexbox and CSS Grid make responsive design much easier. They help align items, manage spacing, and create flexible layouts without relying heavily on manual positioning or floats.
By following these responsive CSS practices, beginners can create layouts that look professional, adapt to different devices, and provide a better user experience across all screen sizes.
Quick Recap of CSS Layout Essentials
- Borders help style and define the edges of elements.
- Background properties improve the visual appearance of web pages.
- Relative units like `rem`, `%`, and `vw` make layouts more responsive.
- Margin adds spacing outside an element.
- Padding creates space inside an element.
- The CSS box model controls how element size is calculated.
- `box-sizing: border-box` makes layout sizing easier and more predictable.
By understanding these CSS basics, you can create cleaner, responsive, and better structured web layouts.
Final Words
Thanks for reading it till here, and we hope you all have gotten a good clarification on CSS layouts with borders, units, and spacing. Becoming a web developer is not as difficult as it may seem; however, certain concepts should be clear to create a well-responsive and eye-appealing website. This write-up discusses some of those concepts that will help you become a fine professional in the web development realm. Also, if you are keen to enter this industry with a good package, you can check out our full-stack web development course on YouTube.
Frequently Asked Questions
Ans. Padding is the space between the content and its border. Margin is a space outside elements that separates them from each other. Padding pushes the content from inside, and margin creates spacing between elements from outside.
Ans. You can use margin: auto with a fixed width to center a div, or use flexbox to put justify-content: center; and align-items: center; at the parent. Lastly, you can consider positioning a centre div through position: absolute, and transform.
Ans.% (per cent)sets the size based on the parent element, em/rem sets based on the size of text or root, and vw / vh represents the width of the screen or the percentage of the height, which makes it best for responsive designs.
Ans. First of all, you need to ensure that the width and the height are the same, like 100px by 100px. Then you have to insert border-radius: 50% in CSS, which will make it a circle shape. Also note, if you are adding an image, then always consider object-fit: cover so that the image fits perfectly in the circle.
Ans. By using box-sizing: border-box, the size of an element is counted along with the padding and border. That means if the width is 200px, then padding and border are included with it without taking any extra space. This helps in easy layout creation, and the elements fit into the design.